
在macOS中,文件传输工具使用小卡车,但是远程连接的shell没有找到好用的工具, 在知道了expect和iterm2之后,发现可以结合两者,实现自动输入密码快捷 登录远程服务器的功能,废话少说,配置开始。
安装expect
使用HomeBrew的安装方式,首先确保此管理工具已经安装:
brew --version
Homebrew 1.2.3
Homebrew/homebrew-core (git revision c851b; last commit 2017-06-25)
没有安装的话参考其他资料安装吧,下面使用HomeBrew安装expect:
brew install expect
==> Downloading https://homebrew.bintray.com/bottles/expect-5.45.sierra.bottle.tar.gz
Already downloaded: /Users/adolphor/Library/Caches/Homebrew/expect-5.45.sierra.bottle.tar.gz
==> Pouring expect-5.45.sierra.bottle.tar.gz
==> Using the sandbox
🍺  /usr/local/Cellar/expect/5.45: 48 files, 702.9KB
expect -version
expect version 5.45
iterm2
安装
brew cask install iterm2
配置导出
iTerm -> Preferences -> Profiles -> Other Actions -> Copy All Profiles as JSON
配置导入
把这个配置文件,复制到新电脑的下面目录下:
~/Library/Application Support/iTerm2/DynamicProfiles/
配置自动登录
expect脚本
在/usr/local/bin目录新建iterm2login.sh文件,以及内容参考如下:
cd /usr/local/bin
vim iterm2login.sh
#!/usr/bin/expect

set timeout 30
set host [lindex $argv 0]
set port [lindex $argv 1]
set user [lindex $argv 2]
set pswd [lindex $argv 3]

spawn ssh -p $port $user@$host
expect {
        "(yes/no)?"
        {send "yes\n";exp_continue}
        "password:"
        {send "$pswd\n"}
        "Password:"
        {send "$pswd\n"}
}
interact
chmod +x iterm2login.sh
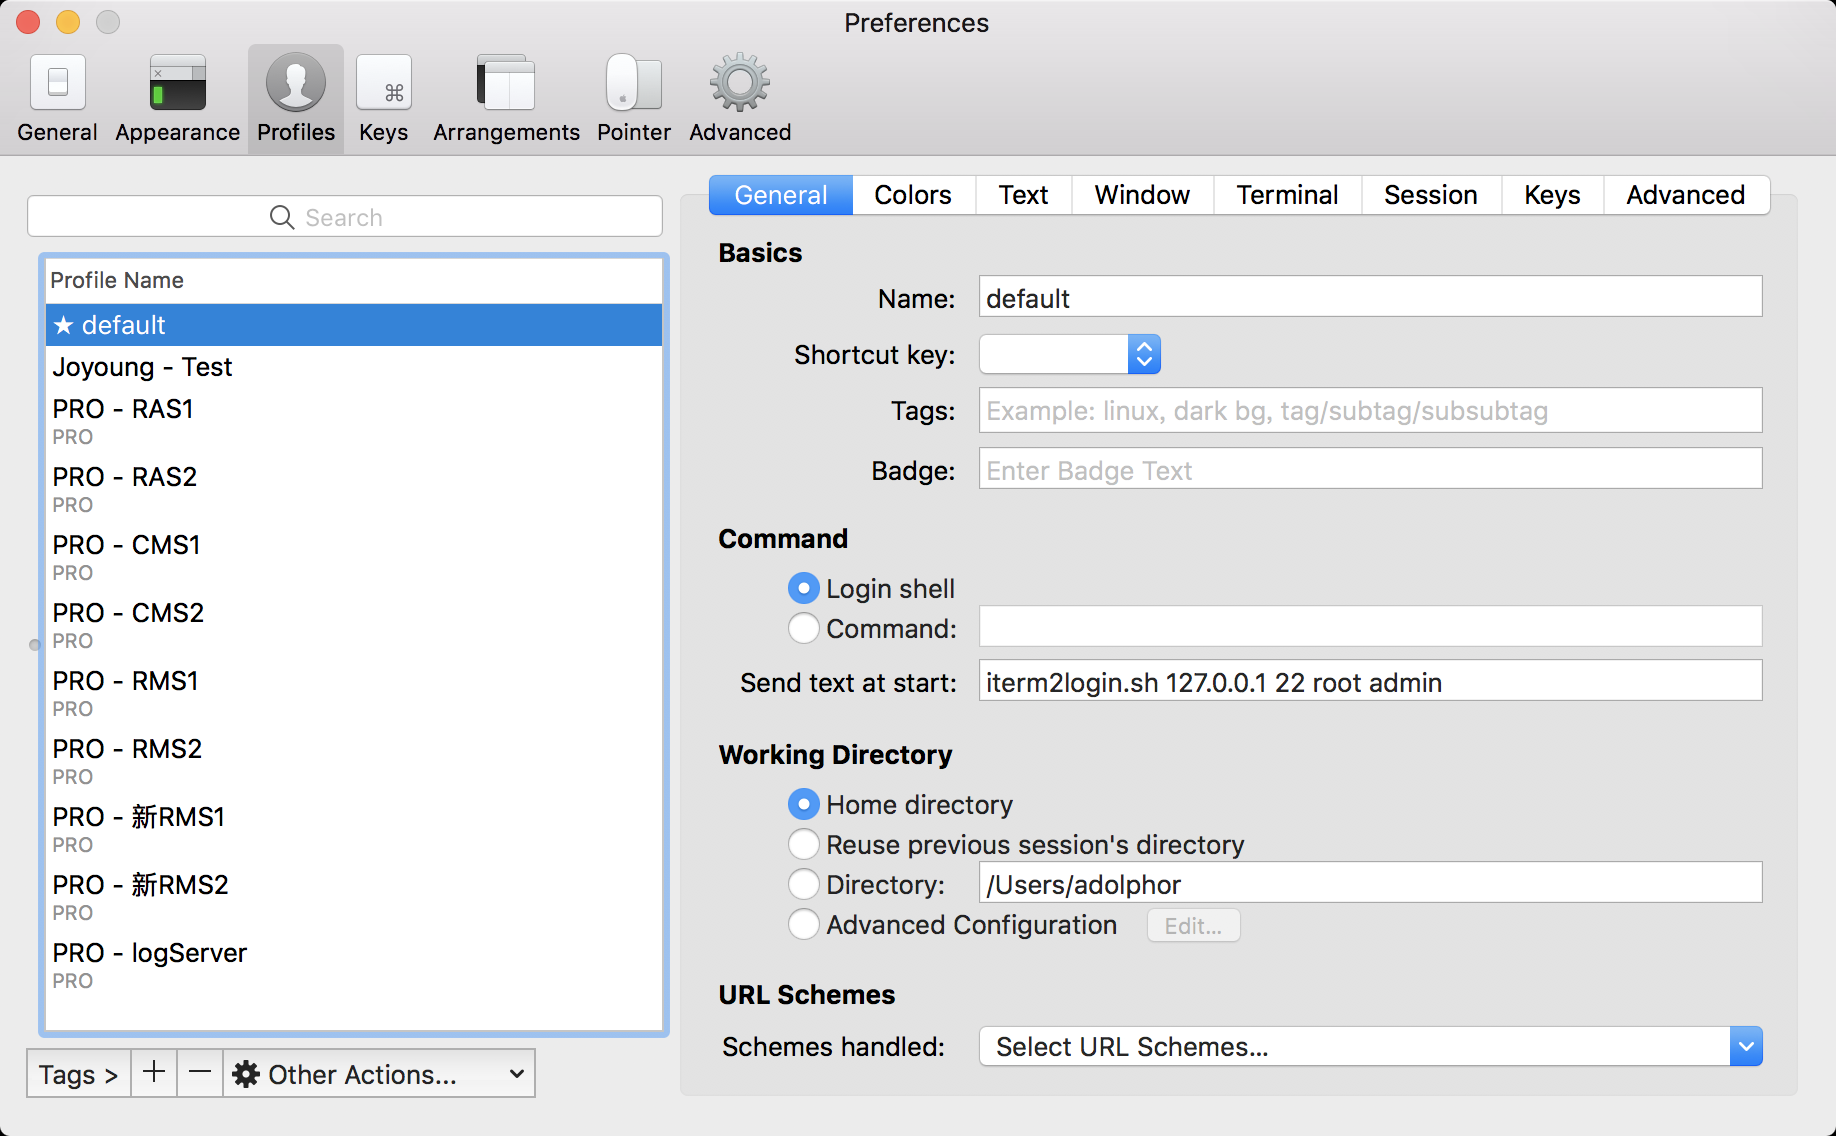
配置itrem2
添加profile,配置如下:
# iterm2login.sh IP地址 端口号 用户 密码
iterm2login.sh 192.168.0.2 22 root admin
配置scp上传
原始指令
# 上传单个文件
scp /path/local_filename username@servername:/path
# 上传目录
scp -r /tmp/local_dir username@servername:remote_dir
expect脚本
#!/usr/bin/expect

set timeout 30
set host 192.168.0.2
set user root
set pswd ssh.pswd
set file [lindex $argv 0]
set path [lindex $argv 1]

if { $path eq "" } {
    set path /tmp/
}

spawn scp -i ~/.ssh/id_rsa_vps_login -rf ./$file $user@$host:$path
expect {
        "(yes/no)?"
        {send "yes\n";exp_continue}
        "Enter passphrase for key"
        {send "$pswd\n"}
}
interact
使用范例
不指定上传路径,默认上传到 /tmp/ 目录:
upaliyun.sh ./test.sh
指定上传路径:
upaliyun.sh ./test.sh /home/temp
配置scp下载
原始指令
# 下载单个文件
scp username@servername:/path/filename /tmp/local_destination
# 下载目录
scp -r username@servername:remote_dir/ /tmp/local_dir
expect脚本
#!/usr/bin/expect

# 使用范例:
# 指定下载路径:scpaliyun.sh ./test.sh /home/temp
# 不指定下载路径:scpaliyun.sh ./test.sh

set timeout 30
set host 192.168.0.2
set user root
set pswd ssh.pswd
set file [lindex $argv 0]
set path [lindex $argv 1]

if { $path eq "" } {
    set path /Users/adolphor/Downloads/
}

spawn scp -i ~/.ssh/id_rsa_vps_login -rf $user@$host:$file $path
expect {
        "(yes/no)?"
        {send "yes\n";exp_continue}
        "Enter passphrase for key"
        {send "$pswd\n"}
}
interact
使用范例
不指定下载路径,默认下载到 /Users/adolphor/Downloads/ 目录:
downaliyun.sh /tmp/test.md
指定下载路径:
downaliyun.sh /tmp/test.md /Users/adolphor/Downloads/
更改TAB页的title
- 先确保 Preference -> Appearance -> Show profile name 已经勾选上

- 再打开 Preference -> Profiles,选中你要设置的 profile,点击右边的 Terminal 标签,
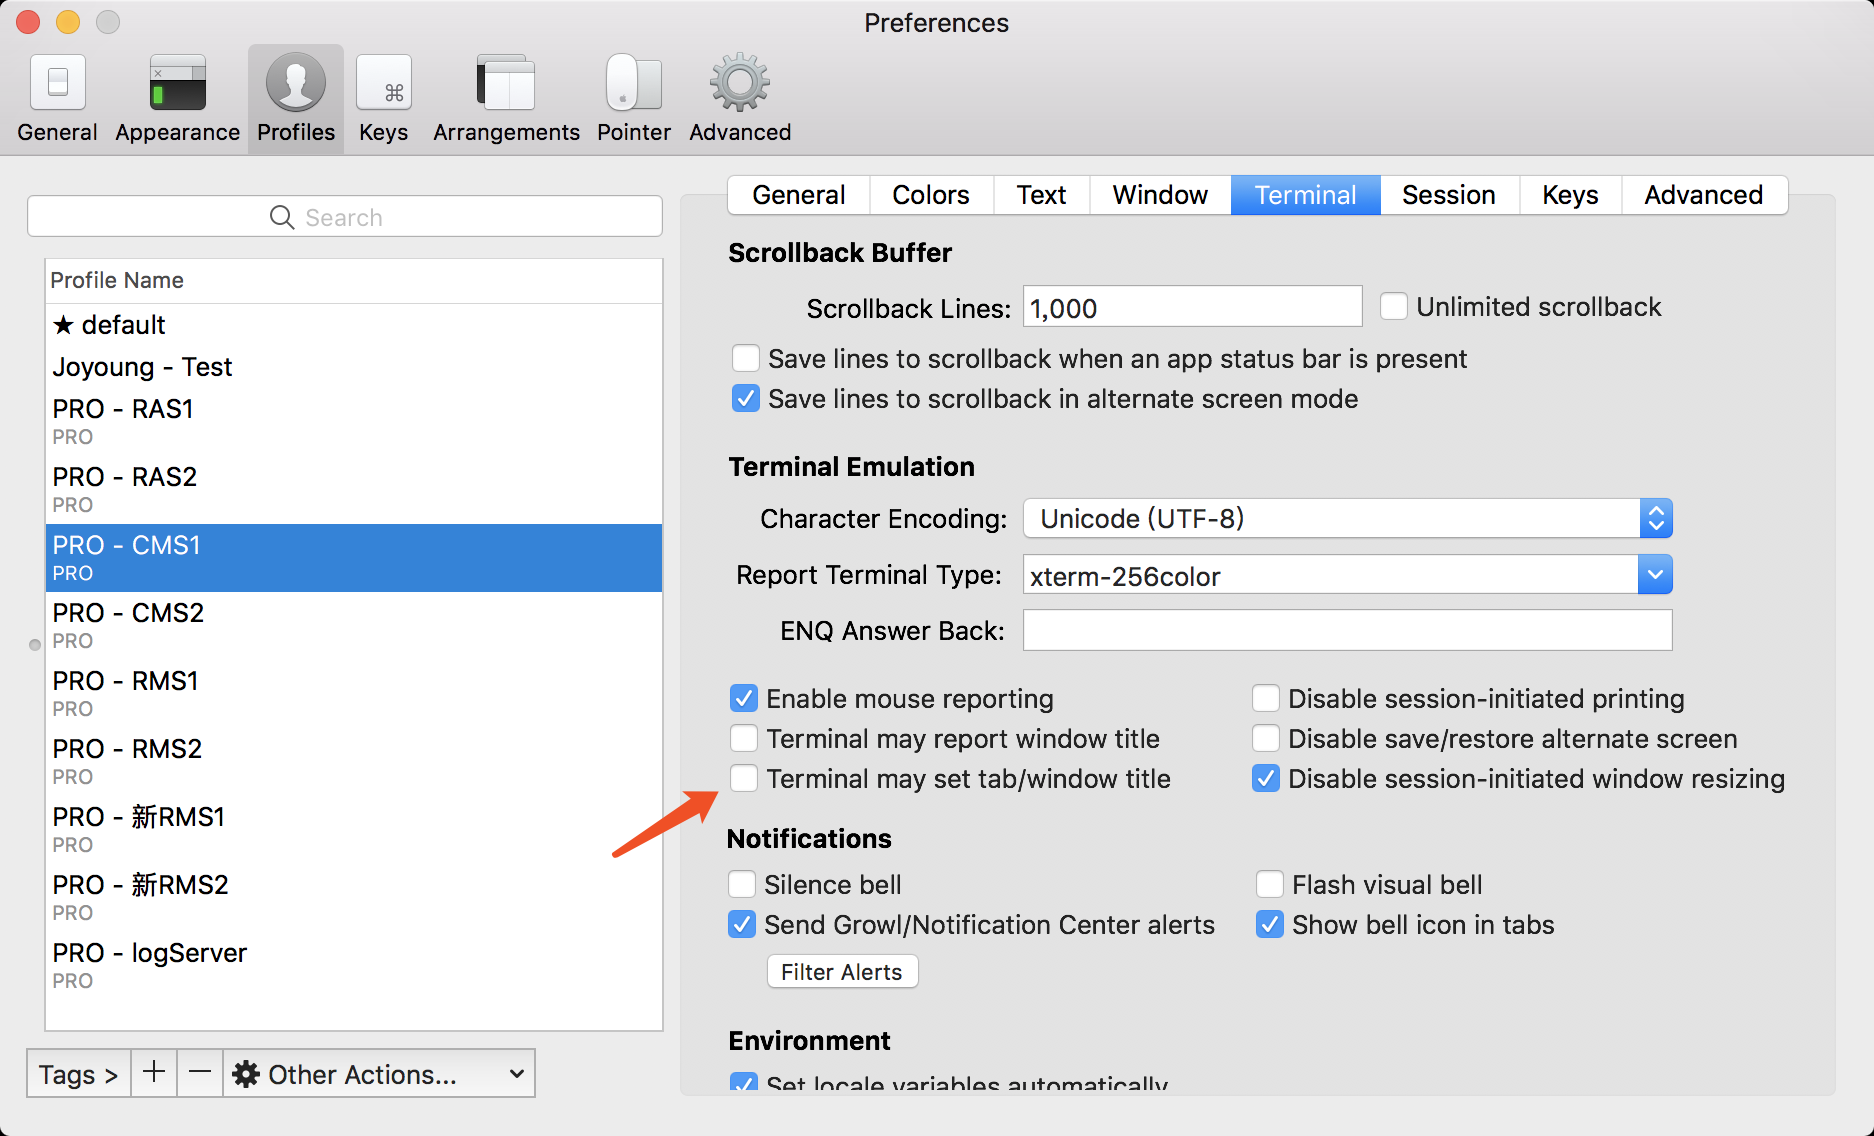 将 Terminal may set tab/window name 前的勾取消掉
保存iterm2的个性化配置
为了防止配置丢失,或者重装系统能够恢复当前配置,可以把当前配置保存在iCloud中。
先在iCloud Drive创建保存配置的目录:
mkdir -p iterm2/config
iterm2中选择 Preferences,general页签下部勾选如下两个复选框:
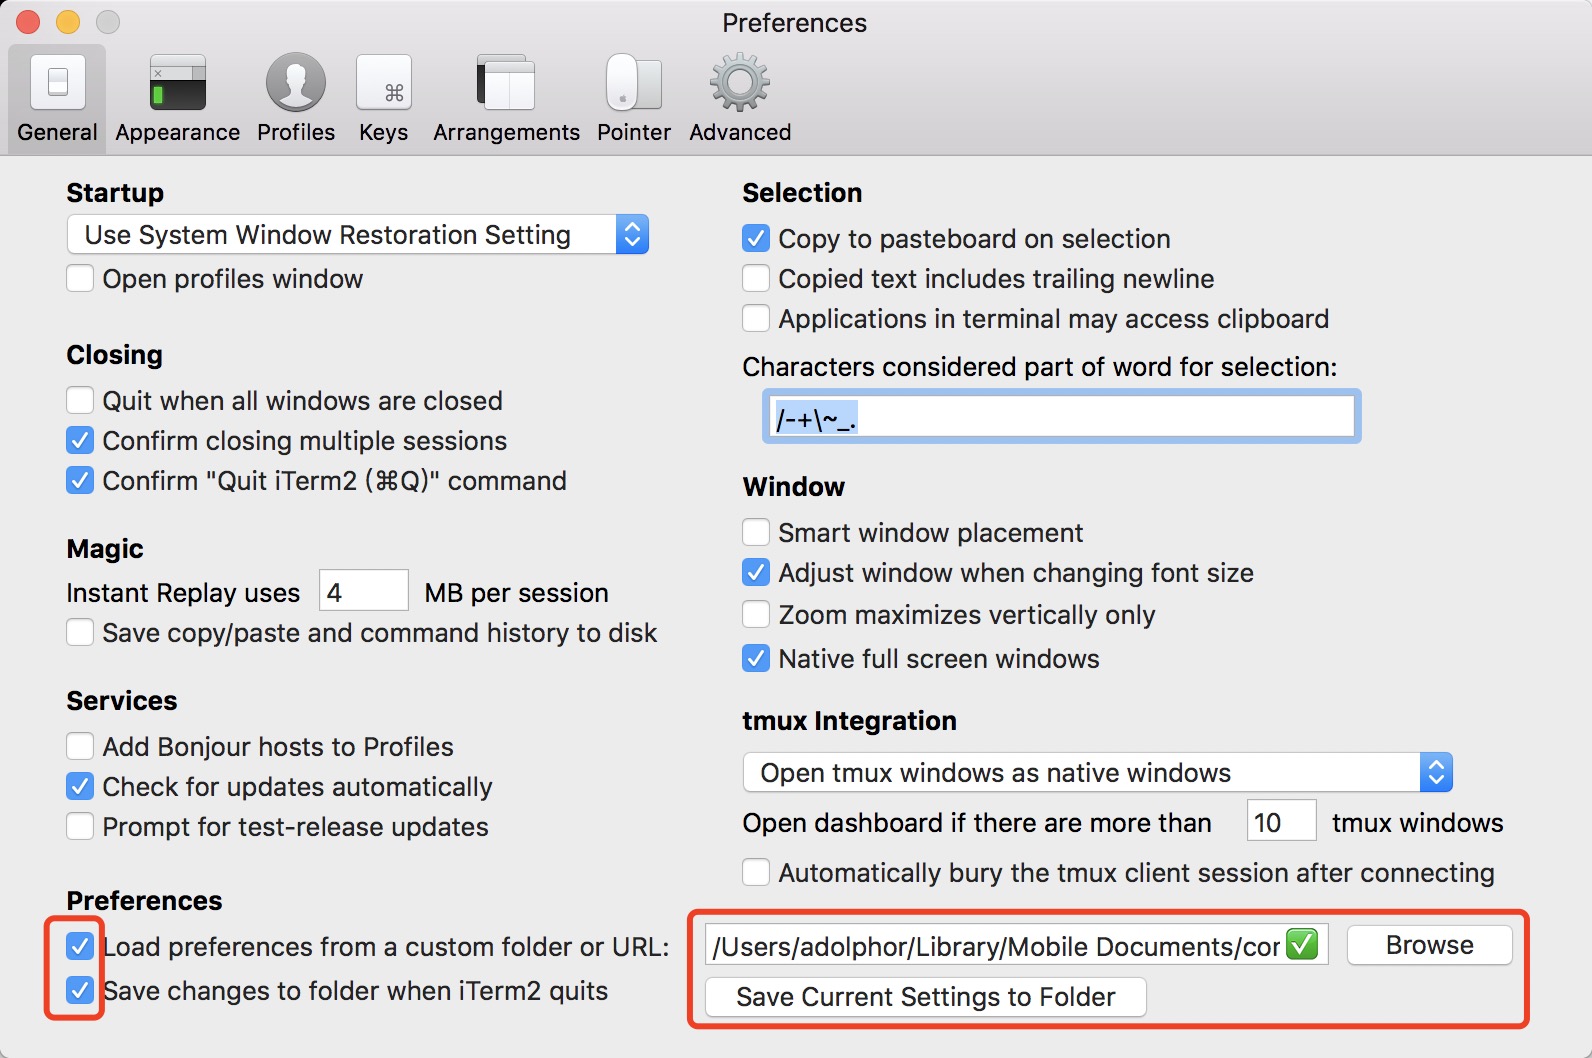
浏览文件夹的时候选择刚才创建的目录,之后确认配置已经保存完毕:

参考
文档信息
- 本文作者:Bob.Zhu
- 本文链接:https://adolphor.github.io/2017/06/26/iterm2-expect-auto-ssh-login/
- 版权声明:自由转载-非商用-非衍生-保持署名(创意共享3.0许可证)